
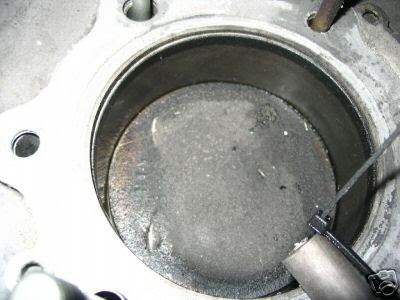
Oddly enough, I don’t really enjoy having dirty hands, but when it comes to mechanical things I’m willing to make some exceptions. Especially if they happen to be motorcycles. I bought the bike on eBay for a whole 221 Euros. It was in pieces and badly in need of all manner of TLC. The engine had some top end damage. The Cam chain had stretched beyond limits and jumped the sprocket. This wreaks havoc on the valves and piston. Luckily the piston, although it was dented, was still ok for further use. I did need to replace the inlet valves, which were bent.
The bike as I got it:-
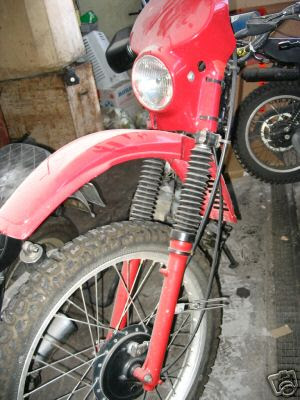
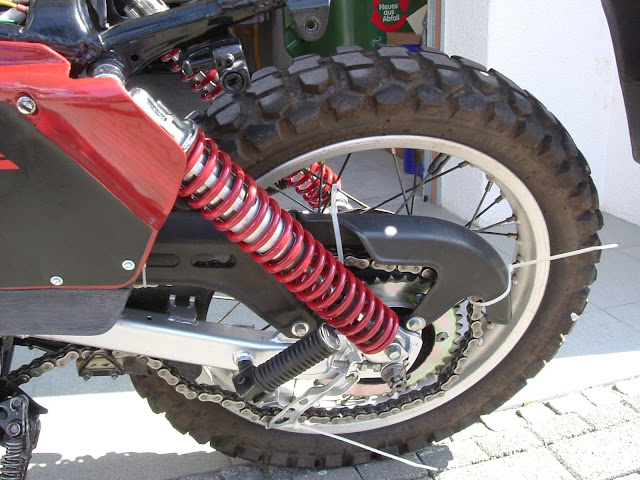
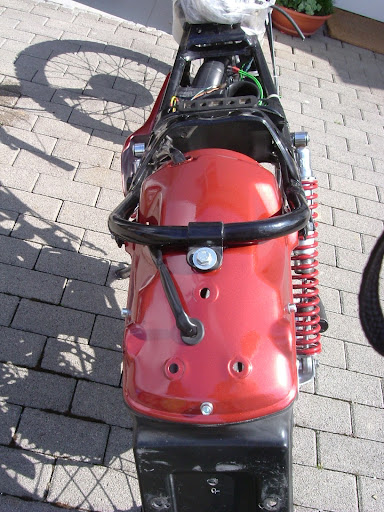
The red paint on the forks and shock springs was some kind of water based paint that literally made your hands red when you touched it.
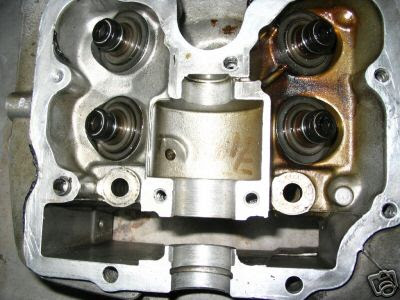
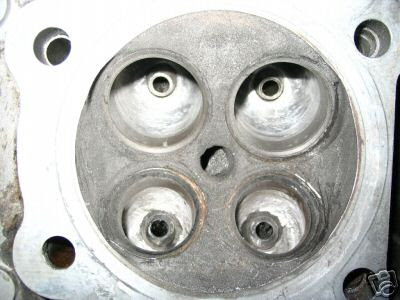
The head was OK, but I replaced the valve stem seals. The guides had no play in them so no need to replace them ![]()
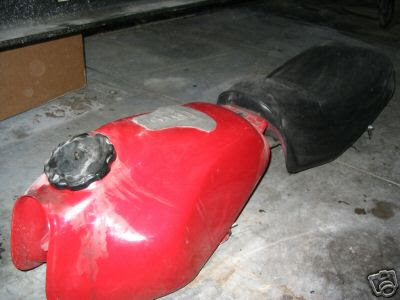
The tank was painted a nasty red colour and the seat was the wrong one for the bike as you’ll see later…
This shot shows what a bad shape the bike was in. It was filthy with old caked grease, oil and dirt. It was partially disassembled. But it was MINE!!!! As you can see however, it was NOT PRETTY..
More pics of the head and piston.
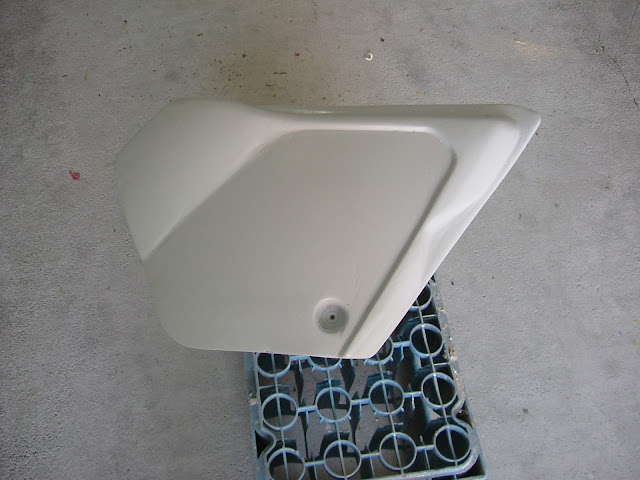
My next step was to tackle the plastics. At some point in the bike’s life some fool had decided to use generous amounts of body filler on the side covers. Kiepie was too busy scraping, sanding and grinding the stuff out to take any pics, so all you get to see is the interim stage, where I sanded and primed the plastics.
Believe me when I say it was a grind..
Right hand side cover.
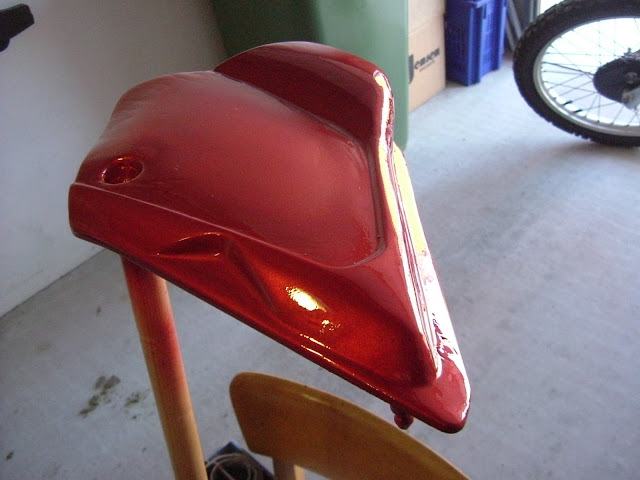
After colour coat applied
(Flower pots perfectly in focus!!) 

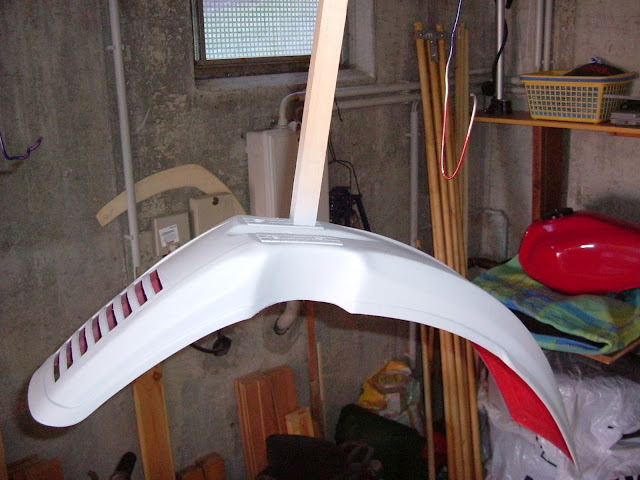
Front mudguard.
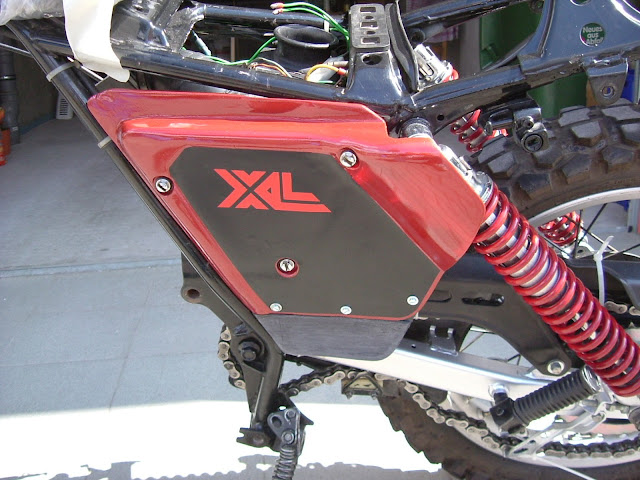
Decals:- I decided to make decals for the side covers, so I downloaded this:-

…and using Photoshop, turned it into this:-

Then printing it onto a stiff card, cutting out and using as a template, made THIS
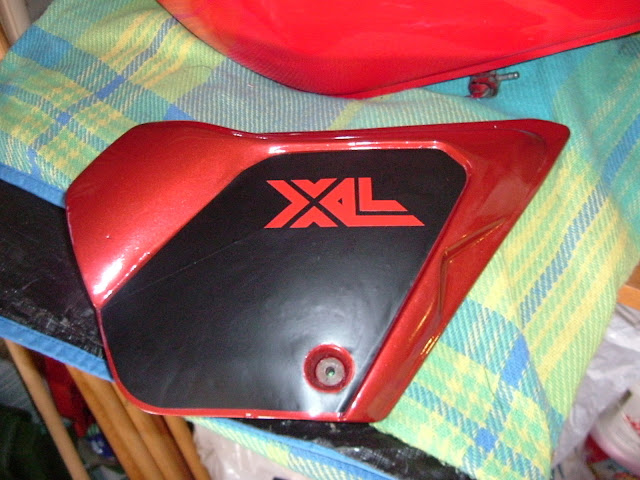
Using Plain black sticker material bought at a local hobby store. I had to cut a line in the black base material to get it to lie smoothly on the cover. With age it had changed shape and the black base simply would not stretch enough to hide bubbles. I know I could’ve gotten prints made but this was more fun. I also know I could have painted the covers a matt black too, but hey, this was FUN! The red lettering is hand-cut red sticker material. ![]()
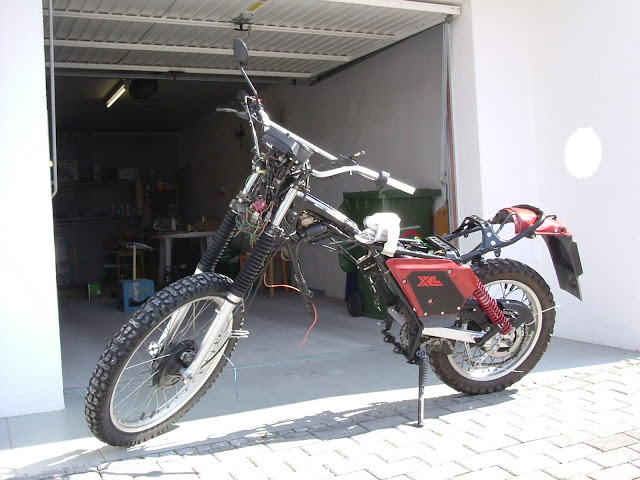
In between letting paint dry and cursing the previous owner/s for all the stupid sheeit they did to the bike, I was also occupied in cleaning the frame, reconditioning the front forks and buying stuff that was missing or not original.
My daughter took some blurry shots of me working on the bike..
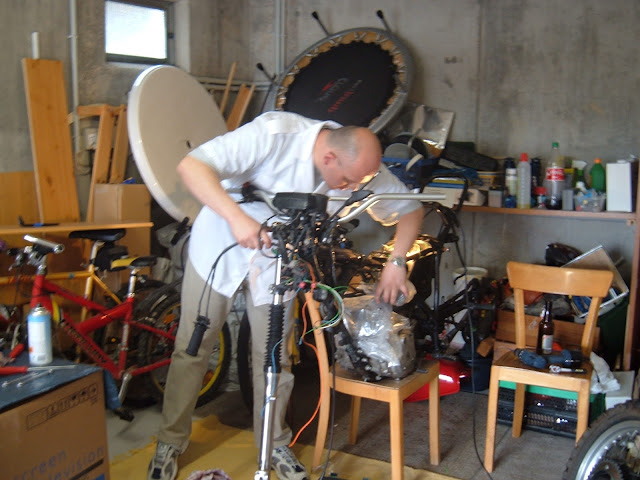
As you can see, my garage was a place for storing more crap than we really needed..
by this time I had stripped the paint off the front forks, resprayed them with Aluminium coloured Wheel paint, and was busy refitting them. By this time I had spent a WEEK, working every day on just cleaning the dirt off the bike. It took a lot of detergent, thinners and elbow grease.. I also had to fix up some of the wiring which had gotten tired and corroded. You can see the newer cables dangling about.
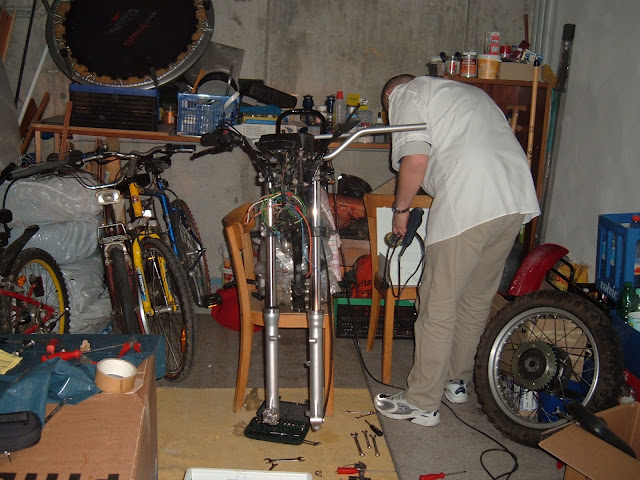
Second fork is on and the Handlebars got the same colour treatment as the forks.
Busy refitting the clutch levers and controls.
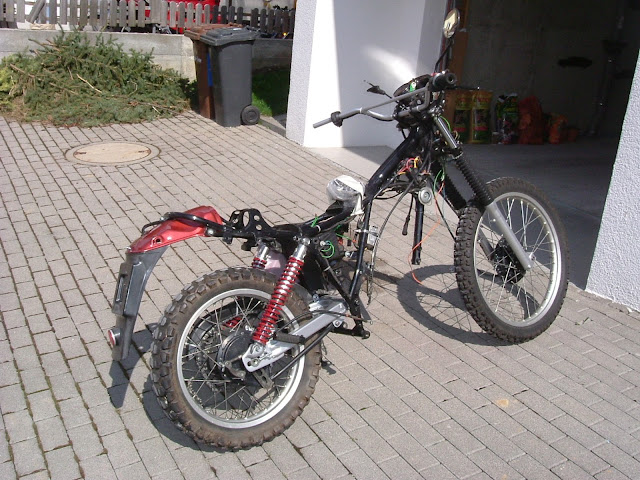
The engine was then entirely removed, and I put the rolling chassis back together as much as possible..
by this time I had also done the swing arm and done my best to make the rear shocks look acceptable. They were later replaced.
Side cover lookin’ sexy!! see how clean that frame is??
I even wiped down all the wiring with thinners to get it looking new-ish..
Rear fender was also resprayed..
Next on my To-do list was the tank. I rubbed it down but kept the original coat and then with my trusty can of Dupli-color I bit the bullet and went in. I could hardly believe my eyes that this could be done with a spray can!!
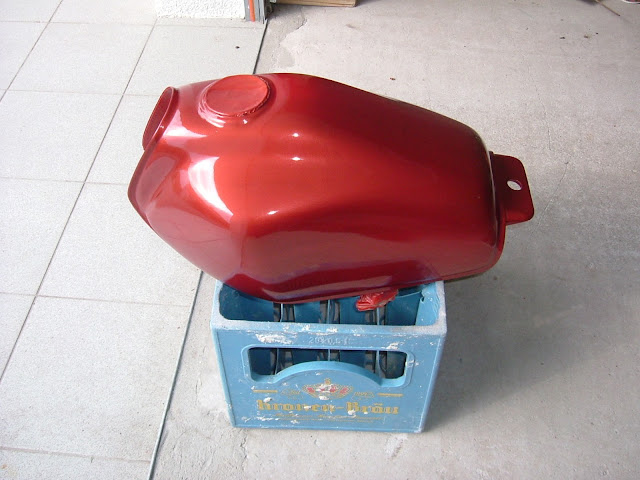
Isn’t that pretty?
Looky looky !!
The proud dad.. (Me)
Did you notice the tail light? I found an original on eBay! the one on the bike looked like it was made in Russia or maybe Red China!! The indicator lights too.. I bought replicas online from a company in Germany. The bike came with “Ochsenaugen” (Ox-eyes) which are those hideous indicator lights that go on the end of the handlebars!! I yanked those off and threw them in the trash as quick as a flash!!
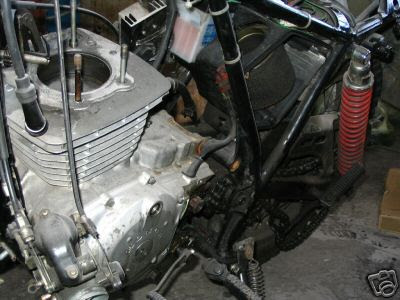
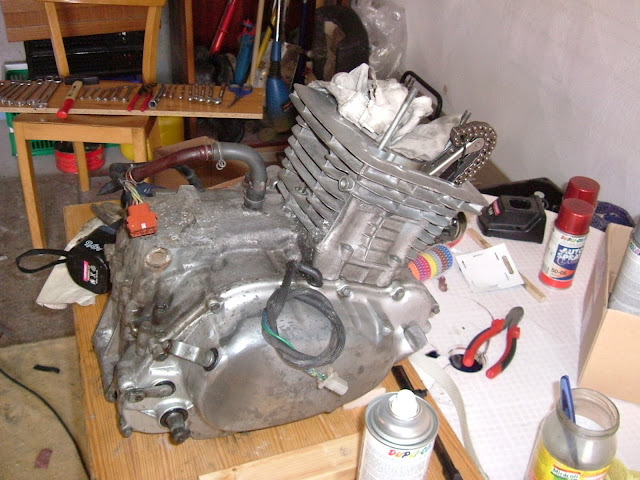
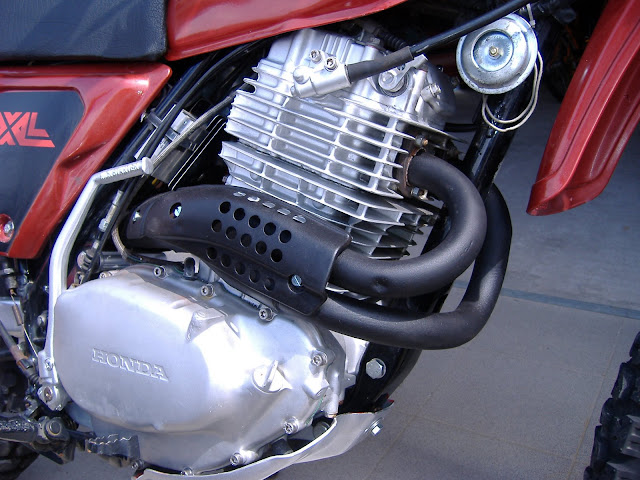
The engine!! Ahh, yes. It was not a happy sight. At some point in its life, the battery had broken/burst/exploded, and acid had gone all over the engine, leaving it discoloured black from the oxidation..
I had ordered the parts online and these had arrived, so now it was time to make the engine go again. my neighbour was coming over and jibing me that this bike would never go again. He couldn’t see how pilot from Africa would possibly know anything about fixing stuff. So, we made a little bet:- On the day I attempted the first start, he would buy me a case of beer if it started, or I would buy him one if it didn’t. 
No photos of work done on the engine at this point as greasy hands and cameras don’t mix, and I couldn’t persuade my daughter to take pics.. So, I put the still dirty motor back together with its new parts, aligned the valve timing according to the manual, set the cold tappet clearances, did a compression test and was satisfied that it would start.
I plugged up all the holes, breathers, inlets and exhaust and then sent the engine for bead blasting..
Here she is ready to go..
That evening I fetched it from an irate German who informed me that oil had leaked from it into his blasting cabinet. I honestly thought I’d drained the oil completely, but obviously some was still left in the engine.. Scheiße!!
I payed the guy extra to have his machine cleaned and took my CLEAN engine home..
I had to strip it down and flush it. I dodn’t want to take any chances on having basting compound in the engine, after all if the oil leaked out, the compound must have gotten in, so it all came off again.
A second, complete gasket kit was ordered for the reassembly..
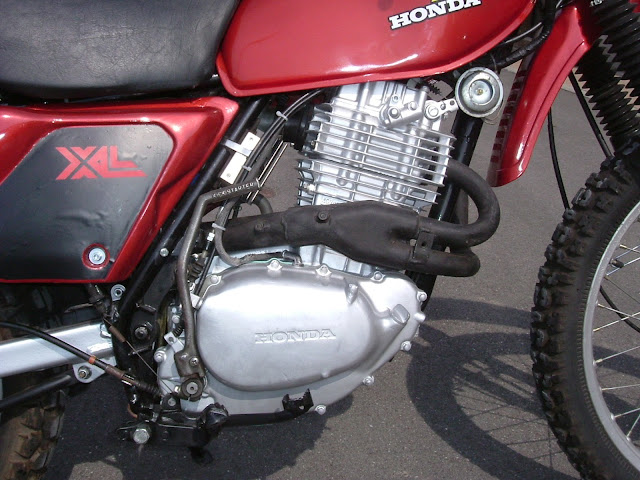
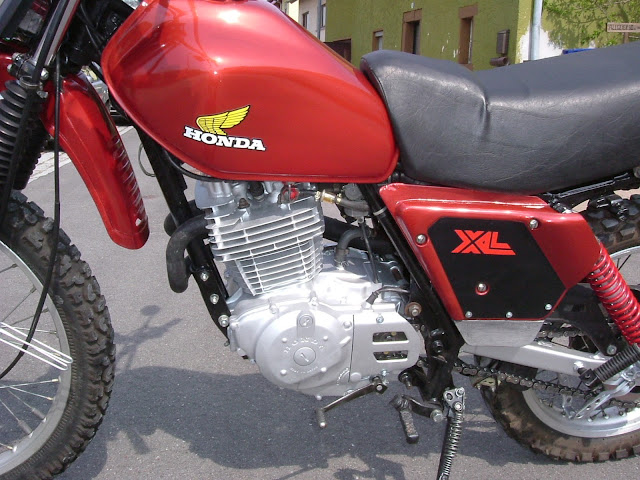
Next day, armed with a few cans of Dupli-Color engine spray (Aluminium colour) I whacked the engine with a few coats… WOW!!!!

That night I reassembled the cylinder and head and completed the engine, giving it its final spray coat before hitting the sack. Next morning, bright and early I was down in the garage again. Let me mention at this point that the engine paint needs to be baked. It is not very resistant until it has been heated to 220°C if I remember correctly. So THAT’s what ovens are for…. Hmm  . Anyway, the engine went in without a hiccup, and I used some new mounting bolts where one or two ere just too knackered to go back in..
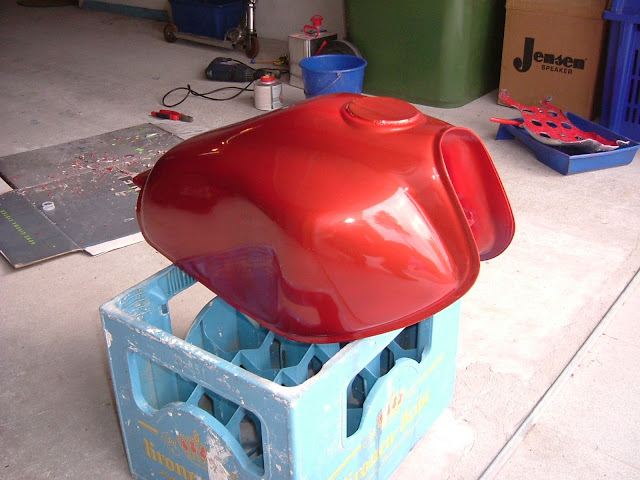
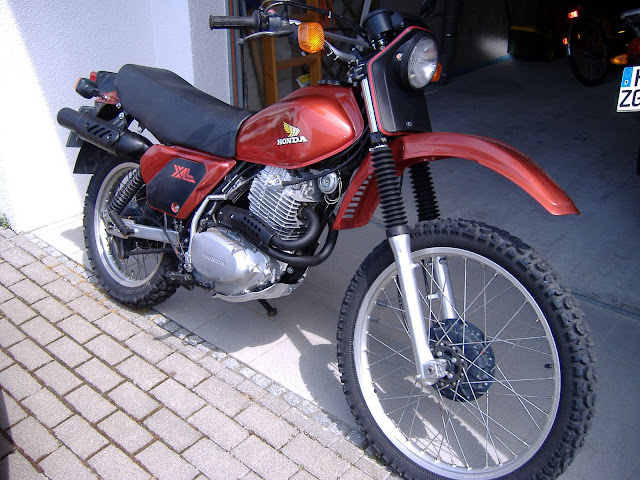
I had also gotten some Honda decals for the tank… (See above and below). The seat turned out to be a XL500R seat. Not a perfect fit for the XL500s, so, back to ebay. I also discovered the heat shield for the exhaust was missing. Couldn’t find a replacement..
At this point I was waiting for my neighbour to come home. I wanted to start the bike!!
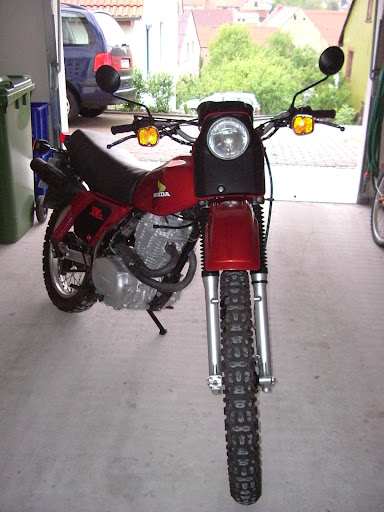
As can be seen, the Headlamp had not yet arrived, but I had made good on my time by treating the Tailpipe with heat resistant black spray. Come on Alex, Mach schnell, I want to start this thing..
Finally, Alex showed up and I hauled him into the garage.
Fuel open – Check.
Ignition on – Check.
Prime carburettor – Check.
Kick…
Kick….
Kick…….
Alex is laughing. I go get 2 beers.. damn.. I really don’t want to lose this bet.. 
Kick……….
Kick…….
Getting the moerin… (angry)
Think, Derek..
CHOKE!!!!!!
Kic-VROOM!!!!!!!
1 case of beer owed to me!!
I took it for a short ride and discovered a strange thing. After about 3500RPM the bike would stutter, splutter and cough and wouldn’t pull. Below 3500RPM it was great. Weird. First thing I bought a carb kit and refurbished the carb. No change. Checked the airbox, cleaned the air filter (again), no change..
Called up a buddy who is a bike mechanic for Honda, he couldn’t think of anything. maybe the valve timing?
No way, I checked that baby thoroughly. I asked him what about ignition timing. His reply:-“Impossible. It’s electronic.” Still, I wan’t convinced. So, Derek buys a timing light and does a check. At idle all is normal. Open the gas and the timing won’t advance.. Bingo!
Turns out the timing advance mechanism was jammed when someone (Not me) installed it using a washer that was too big and was jamming up the flyweight mechanism, stopping it from advancing. It took me 40 minutes to get to the problem, and 1 new washerlater I was on the bike and it was going like it should. ![]()
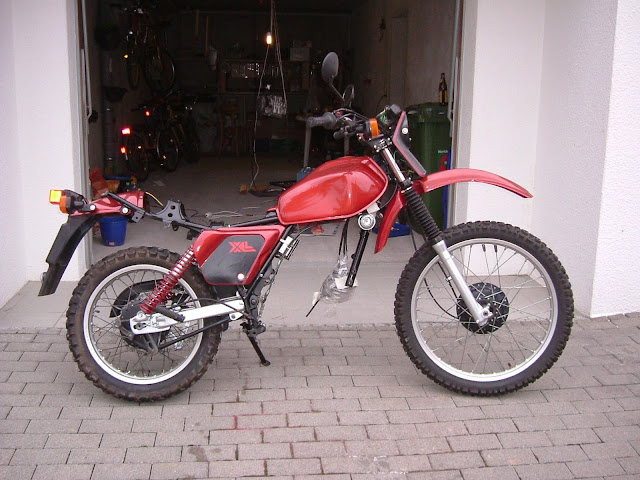
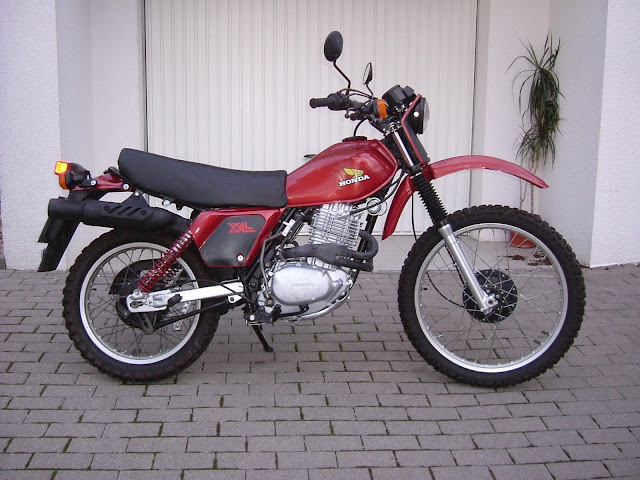
The headlamp showed up after much eBay searching and waiting. AND I got the correct seat too.
Don’t you dig her now??
I took the bike for the roadworthy test. “One time” and got it on the road…
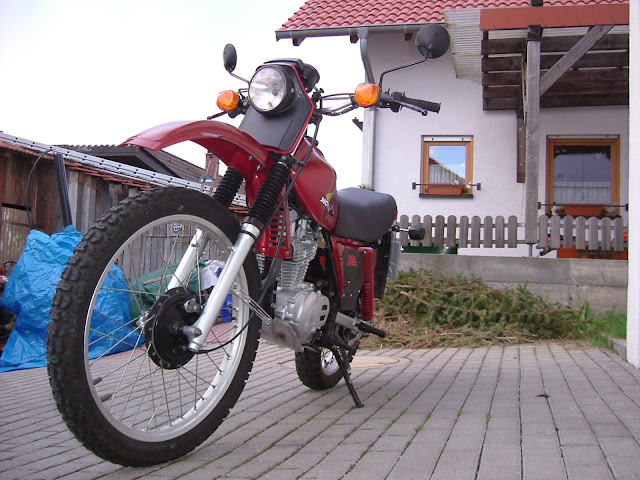
Almost perfect!!
I had made a website tracing my progress and posting pics of the bike. An American fan saw my heat shield was missing on the header pipe so he sent me an email to say he had an original heat shield for me. I replied with my address and asked for his banking details so I could pay for parts and shipping. He said “No way, it’s on me! What a great guy!!
Just perfect!!
I managed to scrounge a bashplate off of somebody too.. 
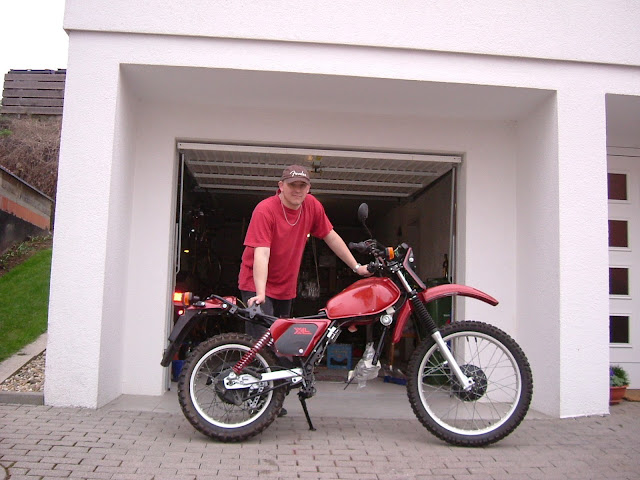
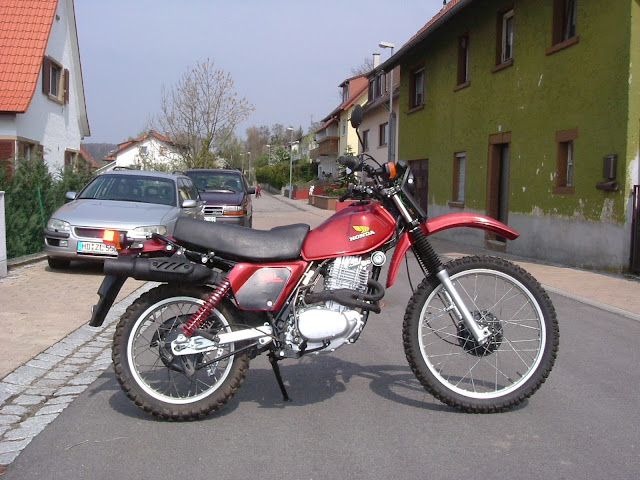
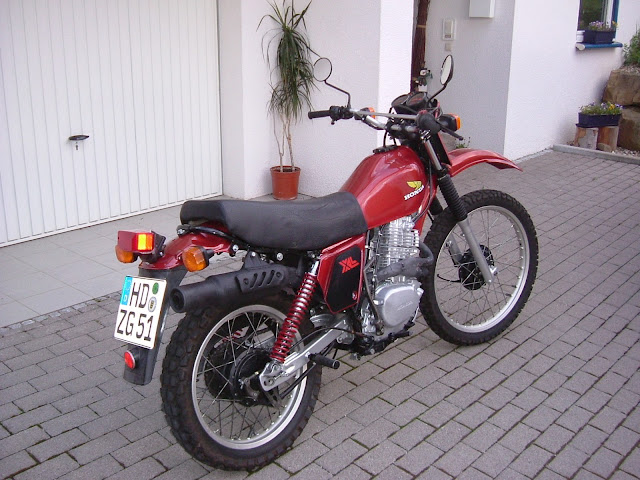
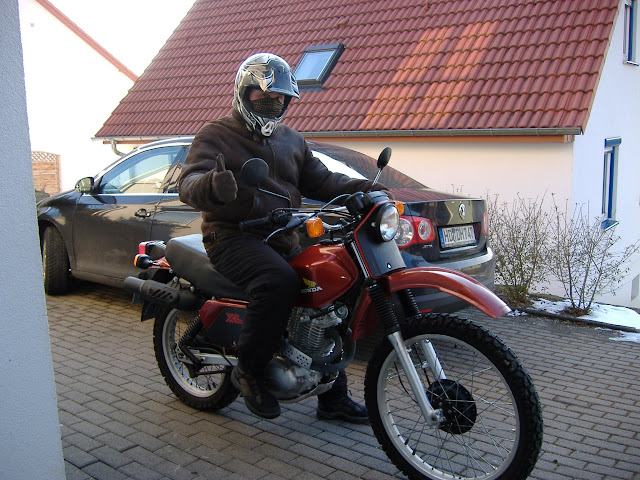
The final product…
I make this thing look like a 50cc, not a 500!!
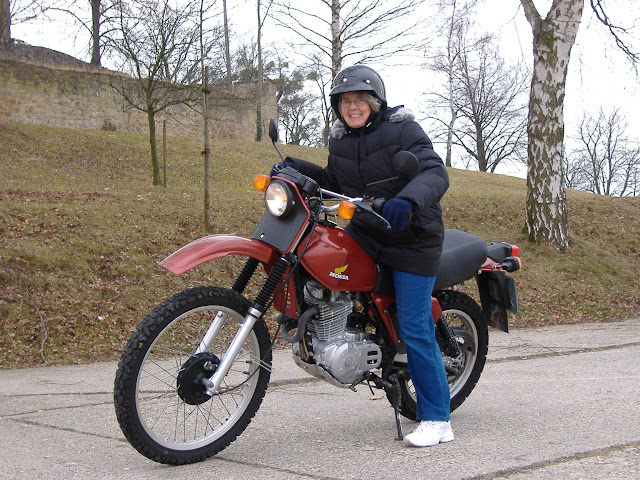
Mom-in-law just HAD to take a ride with me.. posing like she rode it herself..
This is the first restoration I did in a while. The next one was a Honda XR600R. I’ll blog that one too.

Hi Derek, it’s Hans at Practical Sportsbikes magazine in the UK here. How’s it going? Love the XL500. We’re writing an article on people who have restored the XL500 and I wondered whether you still have the bike and whether you’d be willing to chat to us about the work you did to it? If so, my email is hansseeberg@hotmail.com. Cheers!
LikeLike
Hi Hans.
I’ll email you with details this weekend. I’m busy with exams.
Cheers,
Derek
LikeLike
Hi Derek,
i just stumbled across your XL 500 project and wanted to congratulate you on a very well done job. I bought 2 pcs. of Honda XL 500S – 1979 some years ago form Germany and have been restoring the one since then. I am now close to finish the job and am looking forward to driving it this summer. Best of luck enjoying your bike. Best regards from Denmark
Steen Pedersen
LikeLike
Hey Steen.
Congratulations on the build. It’s a labour of love.
It would be nice to see the result. Let me know if you have pics posted somewhere.
Best regards,
Derek
LikeLike
Great work Derick, looks fantastic. I have a 1979 model been sitting in the back of the shed for a while but am getting keen to rebirth it and seeing what you have done inspires me . Cheers
LikeLike
That’s great. Theyre nice bikes. Lots of nostalgia and personality. Enjoy the rebuild!!
LikeLike
Hi Derek
Good job!
I’m in the middle of rebuilding my 1981 XL.
Can I ask what rear shocks you used?
Cheers from Canada.
Tony
LikeLike
Hi Tony. I ordered shocks on eBay.i don’t recall the make but they were cheap Chinese made things because I had no intention of doing offroad riding with the bike.
LikeLike
I’m also redoing a 1981 xl500s and I was wondering if anyone had a tech Manuel or service guide that says bolt for bolt how to put everything back on cause I rebuilt the motor and I don’t know anything about the body and electric
LikeLike
Hi Jake.
Actually, I just cleaned and repainted the shocks, but there are still new shocks available on eBay.
LikeLike
I just restored one XL 100s from 1983, but I’m quite disappointed with the painting job they did on my bike, so next year I will paint it by myself. That’s the lesson of your post: If you want the best work, do it yourself with heart…
LikeLike